Archive for April, 2010

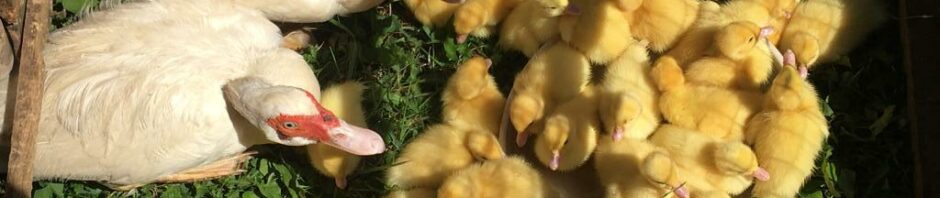
Techniques for natural nesting

Posted in Chickens, Ducks, Farming, Geese on April 5th, 2010 by Nathan – Be the first to comment
A question for Nathan about hatching chickens via natural nesting: 


So, my blue slate pair: she started laying about 3 weeks ago, in a provided dogloo with straw. the ducks also layed there, but since those were infertile (drake got eaten by an eagle), I removed them. the hen was a bit lazy at first, only staying in the nest about half the day. After about 2-4 days of that, she’s been sitting on them most of the day, and I think all night. today is about day 9 of her sitting more often. I was able to count 9 eggs total, during a recent outing of hers.   

?: is this spotty sitting problematic? I was thinking of waiting about 30 days total, and if there’s no activity, removing all the eggs, and hoping she’ll lay another clutch.   

?: if any hatch, can she be trusted to care for the chicks, or should i remove them to a brooder ASAP? Since they were layed over a nine day period (at least), will they hatch over the same period, or will they hatch together?   

?:can the poults eat medicated chick feed? or is there a more appropriate feed?   

I really appreciate your insight!   

Thanks,   

Doug   

Nathan Replies:    

This giant african dewlap gander is an excellent guard for his sitting mate

I’ve had some experiences that might be helpful.  You get to decide how it would apply to chickens, since I’ve worked mostly with geese & ducks over the past 5 years.   

Using a dogloo:   

Not recommended for geese—chickens may do better though.   

3 years ago I used a plastic dog house with plenty of straw as a nest shelter for a pair of ebden geese in our back yard.  It was quick & convenient, which are both strong positives in my book.  The ~6 eggs did not hatch however, even though the goose was a relatively good sitter.  On inspection, I could tell that the eggs were fertile, but did not progress past about the 10-day stage.  There were at least 2 issues here.  The main one was the goose had to sit on a flat surface instead of a cupped nest.  This allowed the eggs to scoot out from under the mom every once in a while and they got chilled.  The 2nd is goose eggs need the humidity from the ground to progress & hatch, and they didn’t get that either.  A 3rd potential problem is that late-stage gosling eggs need abundant fresh air during their last week of incubation to finish out, and that might have become an issue with the plastic floor.  With that said, we did have a broody chicken hatch out a gosling in a plywood box with straw, but it was only sitting on 3 eggs in a small (12”x8”) space.   

Inconsistent sitting:   

This doesn’t seem to be a killer as long as it only happens during the first week.  I’ve been concerned about this with a couple of our geese, but they were became much more disciplined after the first 5 days or so, and had successful hatches.   It is normal for geese to take a 10 minute break twice a day for food & water—it’s amazing to see their consistent timing.   

Checking on progress:   

I’ve candled the eggs at night with a flashlight and removed infertile or dead ones after day 7—that’s when you can see the blood vessels well enough to make a decision.  It’s encouraging to see them grow, and the mom doesn’t mind.  I don’t do this now because the gander is always on guard.  I love an aggressive gander on patrol, but it prevents me from checking the nest like this.   

When the eggs hatch both ducks & geese have behaved similarly.  They continue to sit for another day or two, but take progressively longer outings.  It’s important to put water for the chicks near the nest.  I also like to put feed nearby for them to find it to help ensure survival.  The babies will do best with mom, and she will keep them warm as needed.  We have had problems with independently minded chicks straying off on their own and disappearing due to crows, raccoons & owls.  This is a challenge since the chicks can fit through fences that adult birds can’t.  For goslings, the gander guards them by day, and the goose shelters them at night and during rain.  Drakes don’t seem to do much at all with the little ones—it all falls to mama duck for watching over ducklings.  I had one chicken hatch a gosling 4 years ago.  She was the best protector that gosling could have asked for.   She even kept me away from it!   

Hatching sequence:   

Hens and ducks will lay a fresh egg in the nest every day, and the goose every other day.  It stays cold, but viable.  As the bird gets broody, it will linger longer on the nest after every egg, sometimes for hours as she gets close to officially “sitting”.  I like to reduce the number of eggs to what the bird can cover—usually 8-10 eggs, and a single layer deep.  (There will be trouble if more than one bird can access the nest, or lay an egg next to a sitting mom—who will scoop it up into the nest.)   

When the eggs are cold, they do not progress.  Thus, when the broody mom starts to sit, all the eggs are at the same embryonic stage, and so they all progress at the same time.  This means that they will all hatch at the same time—usually the same day.   It’s a joy to hear the eggs calling through the shell on the day before they hatch!   

Medicated feed:   

Since I do waterfowl, I can’t do medicated feed.  My impression is that medicated feed is to prevent bacterial infection outbreaks in large populations of caged & contained chicks.  I’m doing free range birds, and emphasize healthy diets on healthy pasture.  My opinion is that your birds will do better with a non-medicated ration & access to grass.  The best results I’ve had was when I put out worm filled compost daily for the chicks & ducklings to pick through.  Because chickens scratch, they do much better at this routine.  I’ve successfully put a “working chicken” in my duck pens to turn the compost for them.   

Predators:   

I’ve had sitting birds taken by raccoons, which is why I’ve gone with guard ganders.  It worked last year on an experiment with one goose pair & one duck pair, so I’ve expanded it to 8 pens now.   

Fertility window:   

Last year’s rooster was causing problems for my 4 year old who was responsible to feed the hens, so it went into the stew.  We had the incubator running, so I continued to put the chicken eggs in to see how late they would hatch.  I had eggs hatch that were laid 30 days after the rooster was gone!   

My reason for doing natural nesting is to have the animals do the work instead of me.  It’s great fun to do a little bit of planning and then let nature run the way God designed it to go!   

With encouragement,   

Nathan   


Bone Broth

Posted in Food & good eating on April 5th, 2010 by Nathan – Be the first to comment

Cracking open marrow bones makes a richer broth

We’ve been working through the GAPS diet very thoroughly this spring, and a central part of that has been preparing lots and lots of high quality broth.  Preparation is easy, but it does take a few days to finish.

Here’s the routine I follow.  It’s basically straight out of Nourishing Traditions by Sally Fallon:

I’ve got a 10 quart stock pot that I like to use, and I start out with a couple pounds of bones in the pot.  Since we buy our beef direct from the farmer, the bones come from with the meat from the butcher.  After filling with cold water, I add about 1 Tablespoon sea salt, and 1/3 cup apple cider vinegar and bring it to a boil, uncovered.  As it starts to bubble, I skim off all the foam as it collects on the surface.  This will remove a lot of the impurities from the broth.

I’ve noticed that meat that has been through the koshering process (soaked & salted) has much less foam to skim on the first step—which is interesting isn’t it?

After skimming, I reduce the heat to a low simmer and cover the pot.  At this point I’ll add any seasonings I feel like at the time; black pepper, mustard seed, onion, garlic, rosemary, oregano—often I’ll go through the spice cupboard and take a spoonful of all kinds of stuff and put it in the pot.  I love to put in a stick of kombu (dried kelp) at this point.  http://en.wikipedia.org/wiki/Kombu

Keep an eye on the water level to make sure the pot doesn’t boil down to nothing and burn during the next 3 days.  Yes—3 days, 72 hours.  You can add water as needed, but I think the result is better to just to keep the simmer low and the lid tight.  I have a gas range which doesn’t like to simmer, so I end up putting a skillet under the pot to help prevent the broth from boiling too hard.  You can see it in the photo.

On occasion, I’ll get marrow bones that aren’t cut in half by the butcher.  These in the picture goat shank bones, and I broke them in half after nicking them with a hack saw.  This lets the marrow add to the broth.

By the end of the 3 days, the bones will be much softer—if you remembered the vinegar you will be able to crush them with your fingers, and the broth will be thick & rich.  Strain out everything and let the broth cool.  If there is too much grease on the top, it can be removed easily after it’s chilled in the refrigerator.  I save the extra grease for tallow candles—which will be a future posting.

My kids and I all love the Yorkshire pudding from the marrow bones, and we will spoon it out while it’s still hot in the strainer.  On the very rare occasions where there is more than we want to eat, I just add it back to the broth.  The bones go into the wood stove so they will crumble quickly & easily when the ashes are spread on the pasture to return the much needed phosphorus and trace minerals back to the soil.

All poultry bones return to the stock pot after the come off of our dinner plates—yes, even after those roasted chicken drum-sticks been chewed on by the kids.  Nothing goes to waste when it comes to our valuable pastured poultry!  I add the extra chicken or duck or goose feet from our stash in the freezer to the pot on those days as well.  These were kept in the freezer since summer’s butchering days to add to winter & spring’s soups.

Enjoy!

Yogurt starter cultures

Posted in Food & good eating on April 5th, 2010 by Nathan – Be the first to comment

Nathan replies to a question from Autumn about where I get my yogurt cultures:

Autumn,

Kathy asked me last week if I could forward you where I’ve been getting my yogurt & cheese cultures.  I’ve been going to http://www.danlac.com/

The person running the site is named Egon Skovmose, and is very friendly to work with.  His phone number is (403)948-4644; fax 948-4643.  The culture envelopes are sized for 130 gallons of milk at a time, so I keep the opened portion in a small jar in the freezer, and just use a pinch at a time.

YoMix401 from Danlac makes the most delicious yogurt we've found

After our goats dried up last winter, we were using purchased raw cow’s milk for yogurt, which I’ve learned is tricky to make into yogurt without curdling.  We now have spring “kids” and I’ll be back into cheese making in a few weeks.  Hooray for fresh grass!

Our regular routine is to add the culture to the warm from the goat milk, and put it immediately into the incubator for 24 hours culture.

Good luck!

P.S.

I forgot to add that the yogurt culture that I like is the Yo-Mix 401. Store yogurt also works for a starter, but all the ones I’ve tried have turned out to be very sour.  We learned of this source from Grace Harbor Farms dairy—I was using their goat yogurt as starter because it gave the best flavor by far of all the other store brands we found.  I contacted them directly to learn about this source.  This one package goes for $8.50 Canadian + shipping. 

http://www.danlac.com/ingredient/yo-mix%E2%84%A2-401-lyo-50-dcu